Azure AD integration allows Carillon to target management rules directly to Azure AD groups and devices. When you create dynamic Azure AD group for your devices and then create Carillon management rules for this Azure AD group, your Azure AD connected devices will automatically receive your management rules when devices are joined to Azure AD and dynamic group memberships have been updated.
You can add multiple Azure AD tenants to single Carillon environment.
Note!
Azure AD integration can be only used to manage native Azure AD joined devices. For hybrid Azure AD devices (that are joined to both on-premises AD and Azure AD) must be managed as on-premises AD devices.
1. Create Azure AD App Registration
You need to create Azure AD App Registration to the target tenant and you need to have permissions to register new Azure AD Apps. IF you do not have permissions to create Azure AD App Registration, then you need to send these instructions to some one who has permissions to create Azure AD App Registration. Only this step is required to be performed by user who has proper permissions and you will need to receive following information when this step is completed: Directory ID (also known as tenant ID), Application ID (also known as Client ID) and Client Secret
- Open https://portal.azure.com
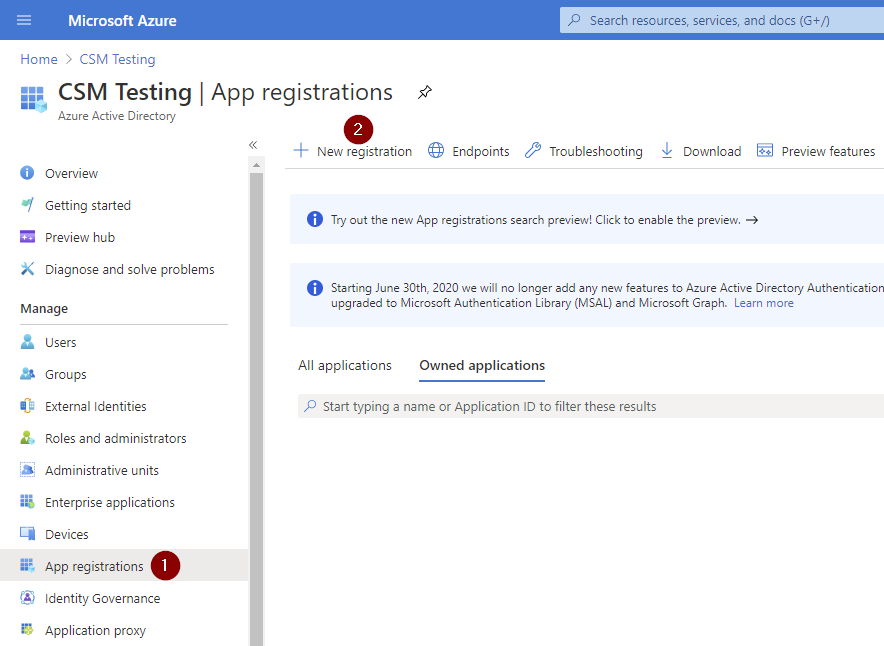
- First click App registrations and then click New registration
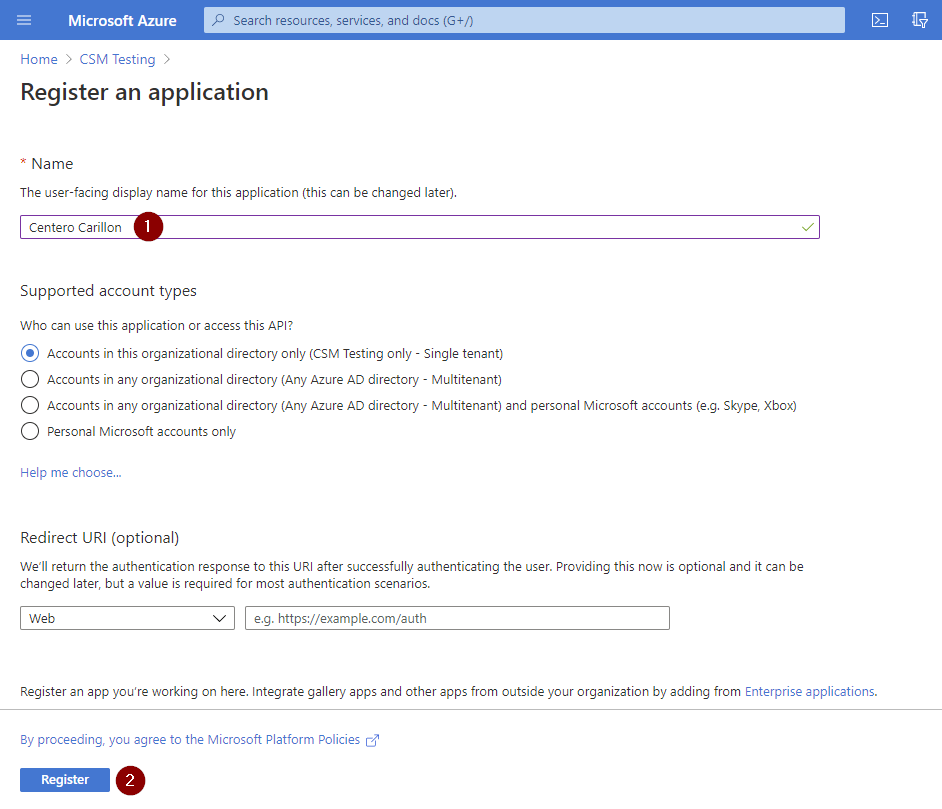
- Specify name for the application (for example Centero Carillon) and then click Register
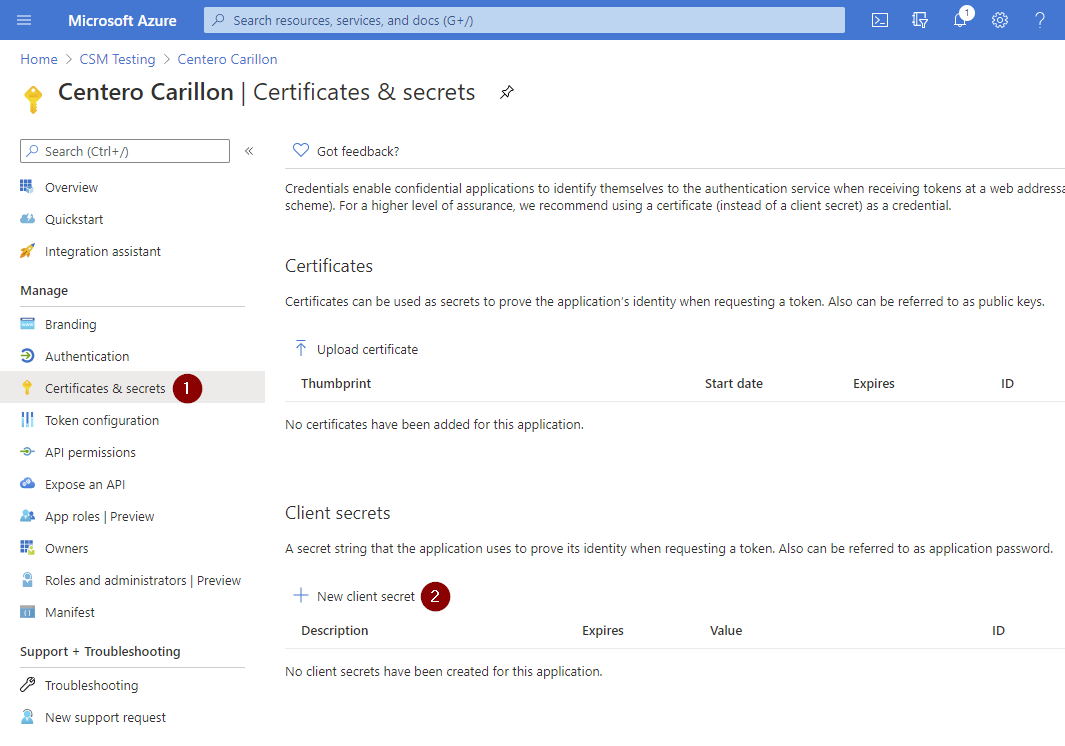
- After App is registered click Certificates & secrets and then click New client secret
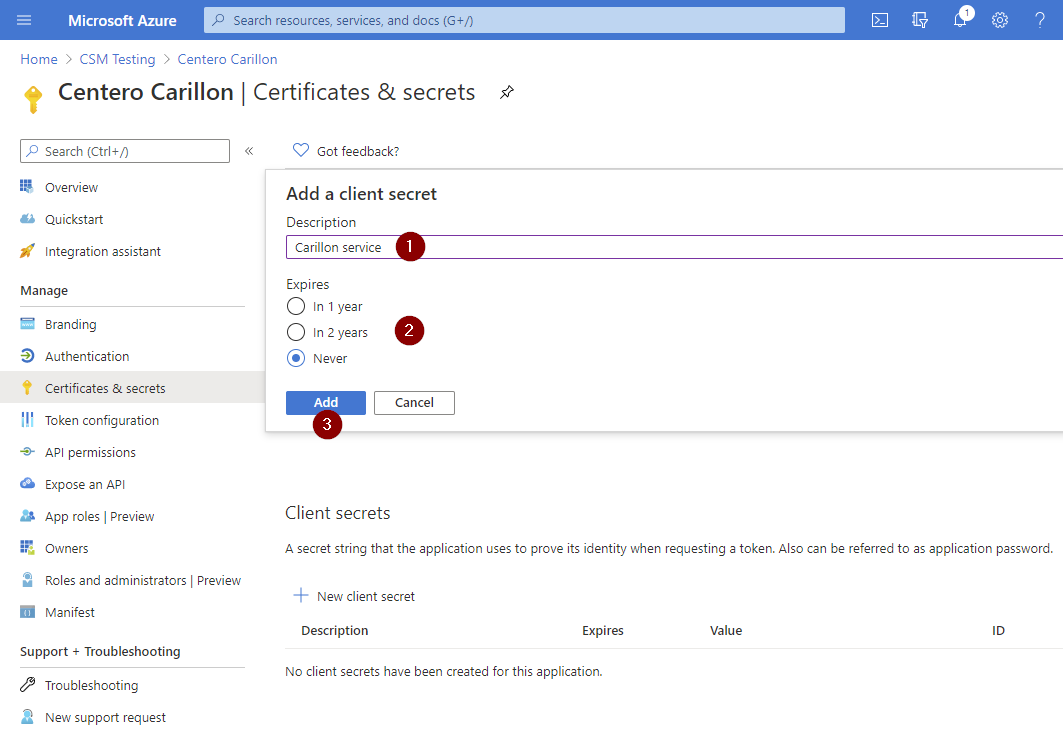
- Specify description for the secret (for example Carillon service), then select validity time for the secret and then click Add
Note!
If you select validity time other than Never, you must create new client secret before current expires and then change client secret also to Centero Carillon management portal to Azure AD directory
- After secret is created DO NOT navigate way from the page before you have completed next step!
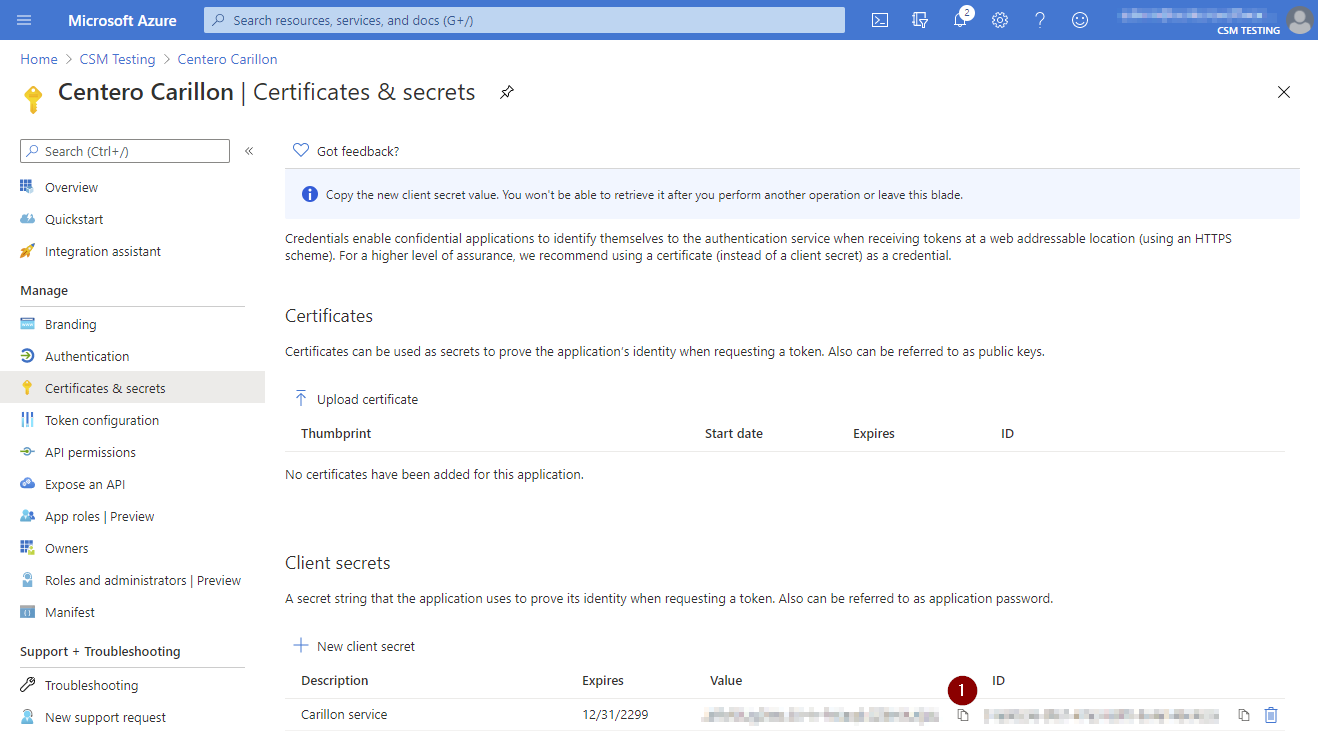
- Copy client secret value to clipboard and save the value to secure location (if you need to access client secret later). You are not able to see client secret after you have navigated away from the page. Also Carillon management portal will not show you the client secret and you will need to specify client secret always when you modify your Azure AD directory in Carillon (for example if you want to change the display name of the Azure AD tenant in Carillon).
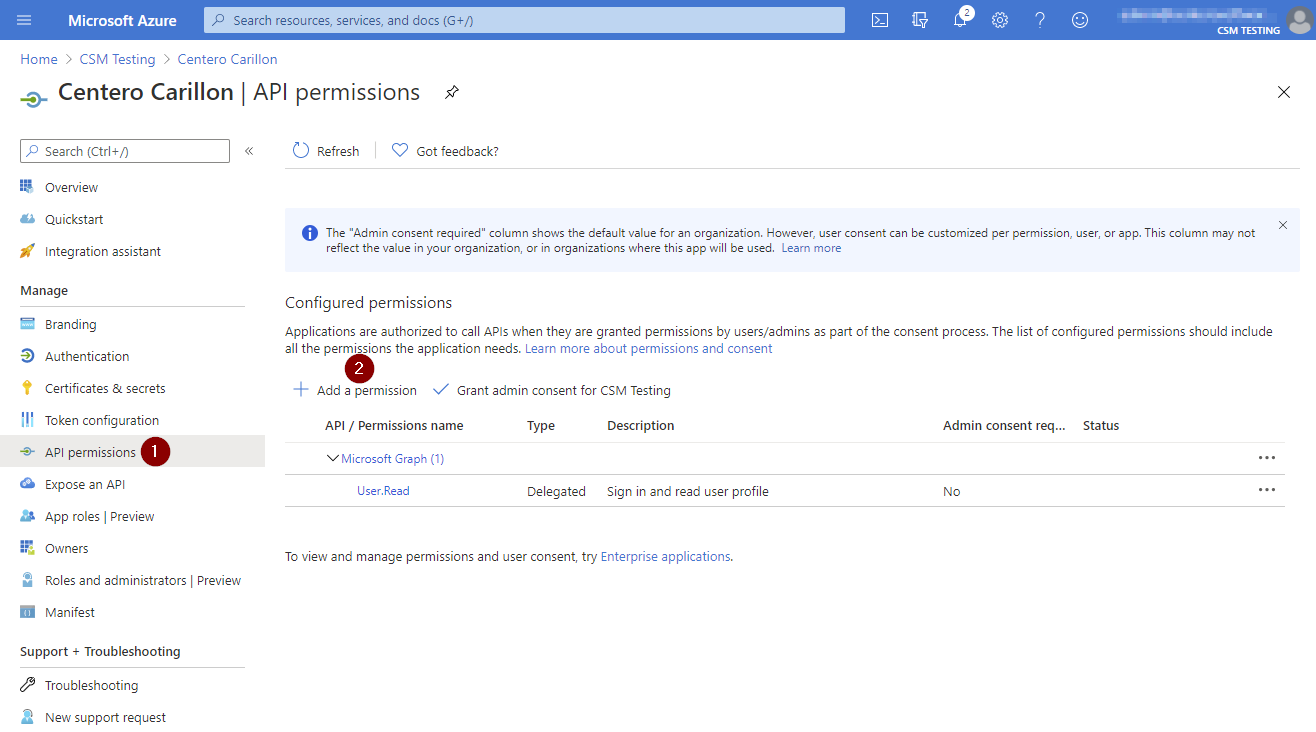
- Click API permissions and then click Add a permission
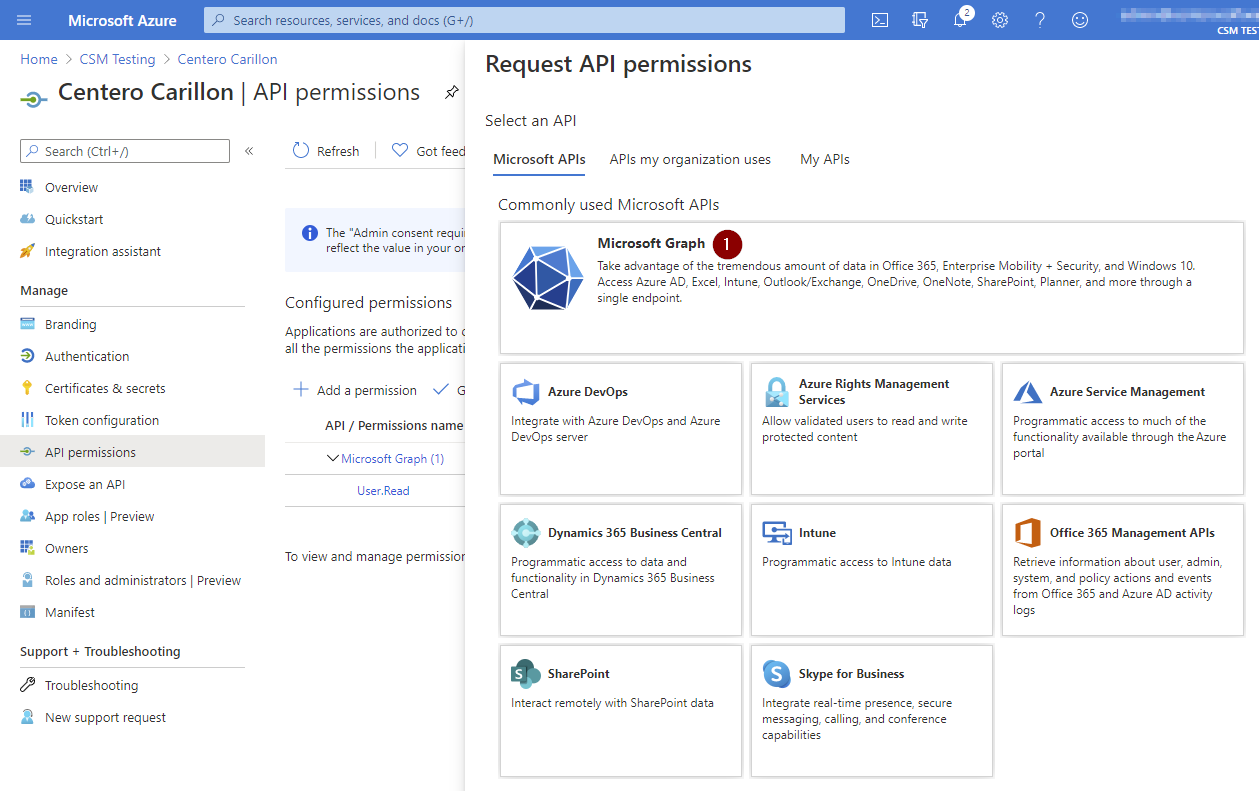
- Click Microsoft Graph
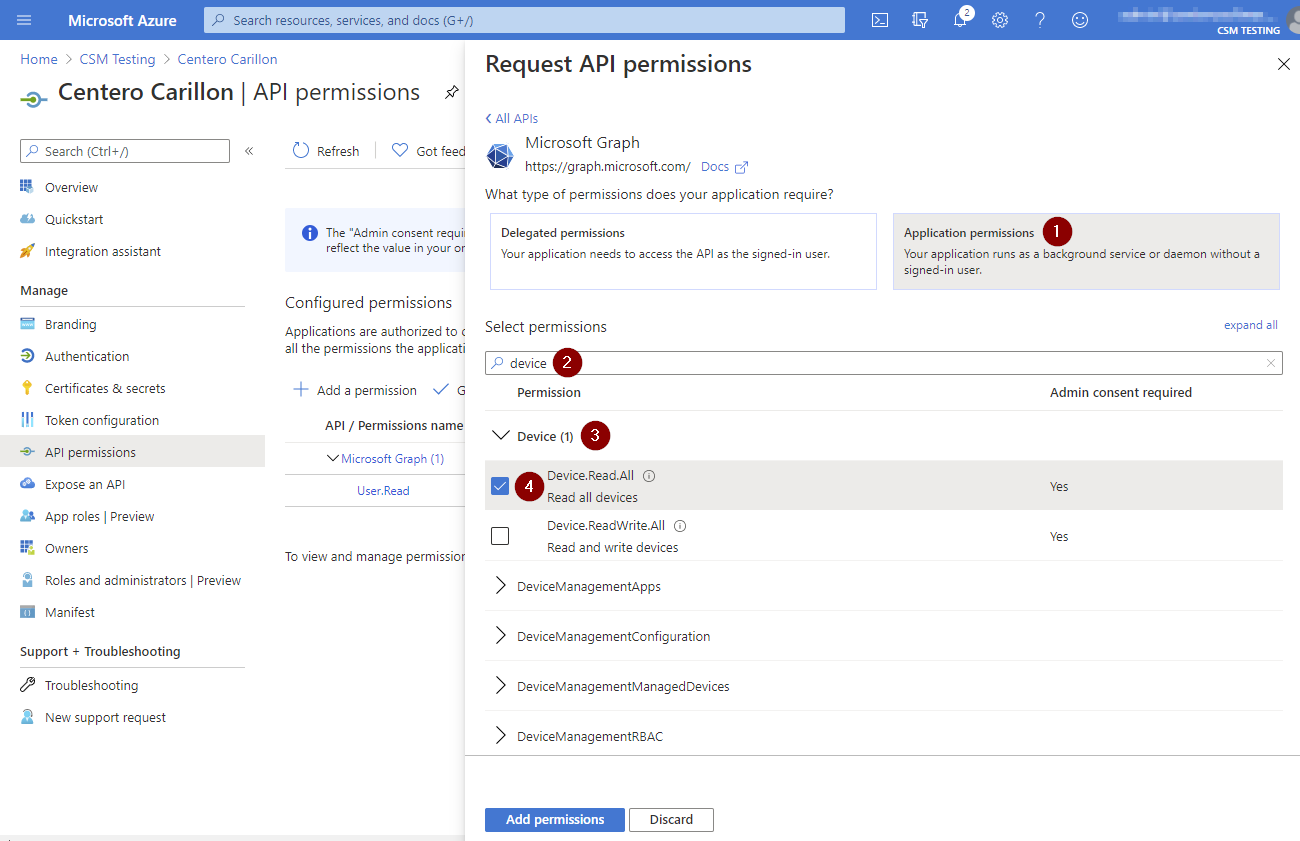
- Click Application permissions, then type 'device' in search permissions field, expand Device and then select Device.Read.All
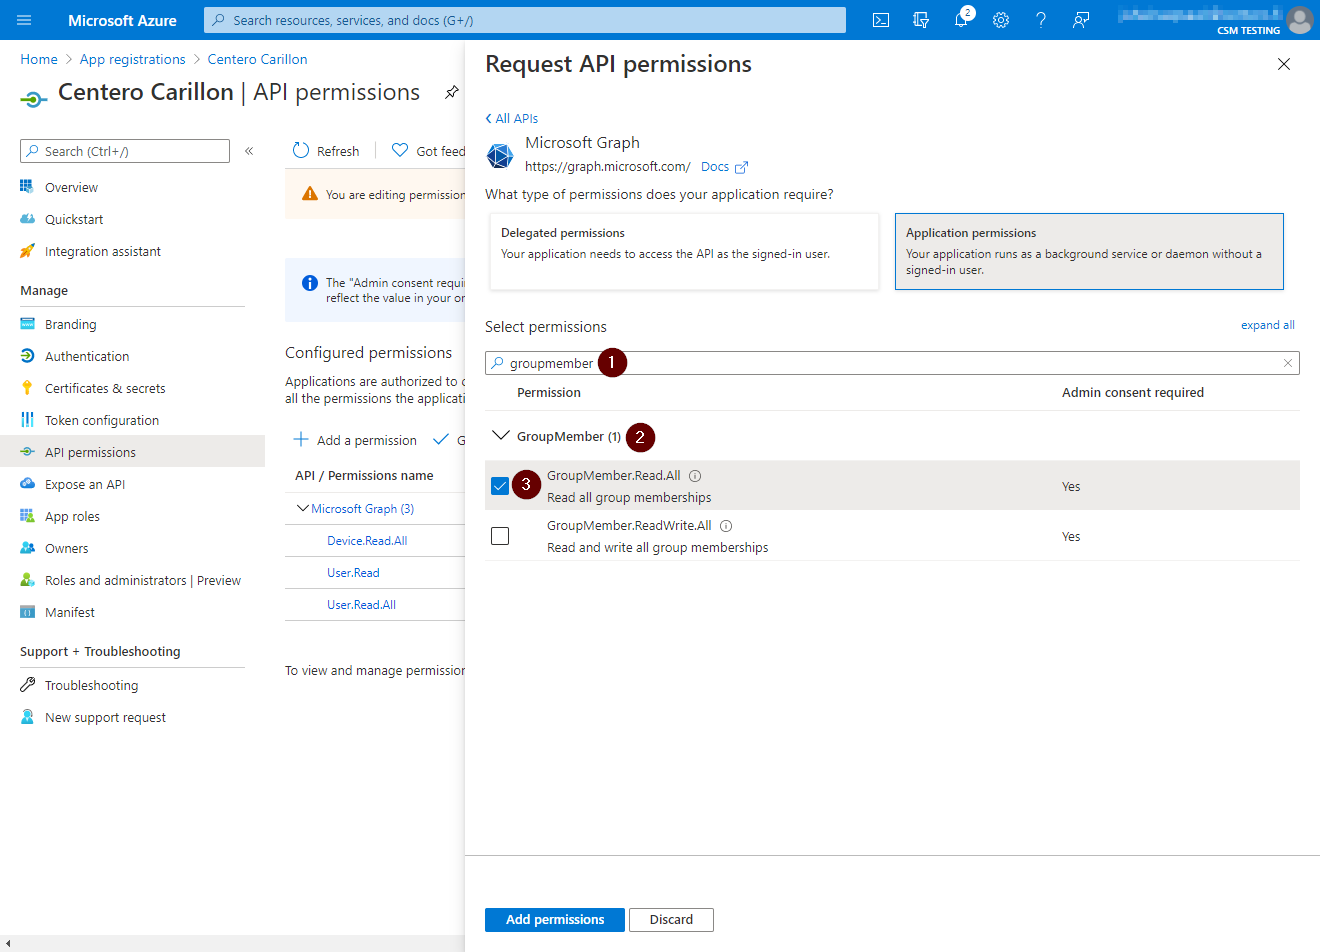
- Replace search permission value to 'groupmember', expand GroupMember and then select GroupMember.Read.All
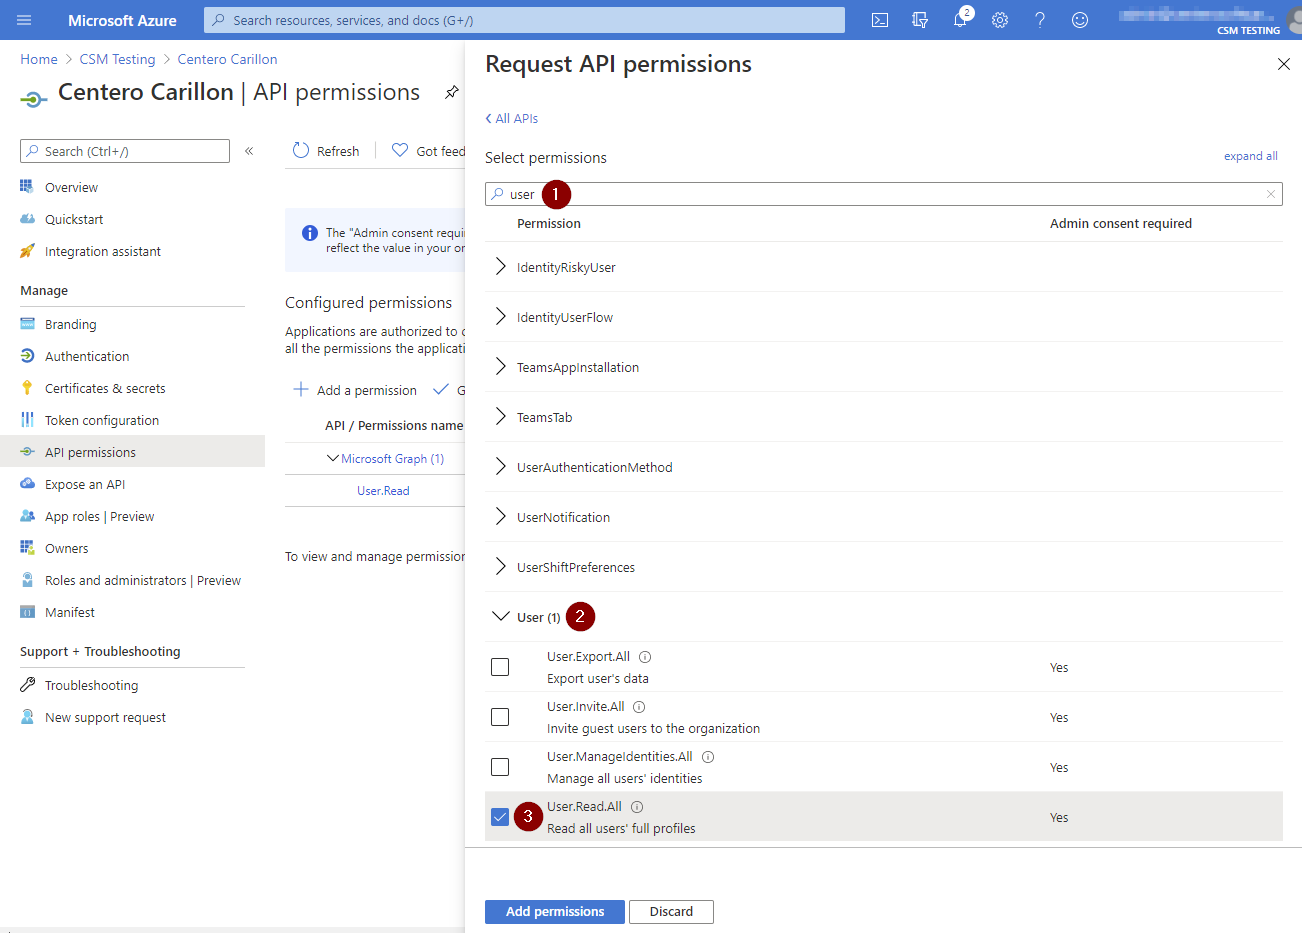
- Replace search permission value to 'user', expand User, select User.Read.All and then click Add permissions
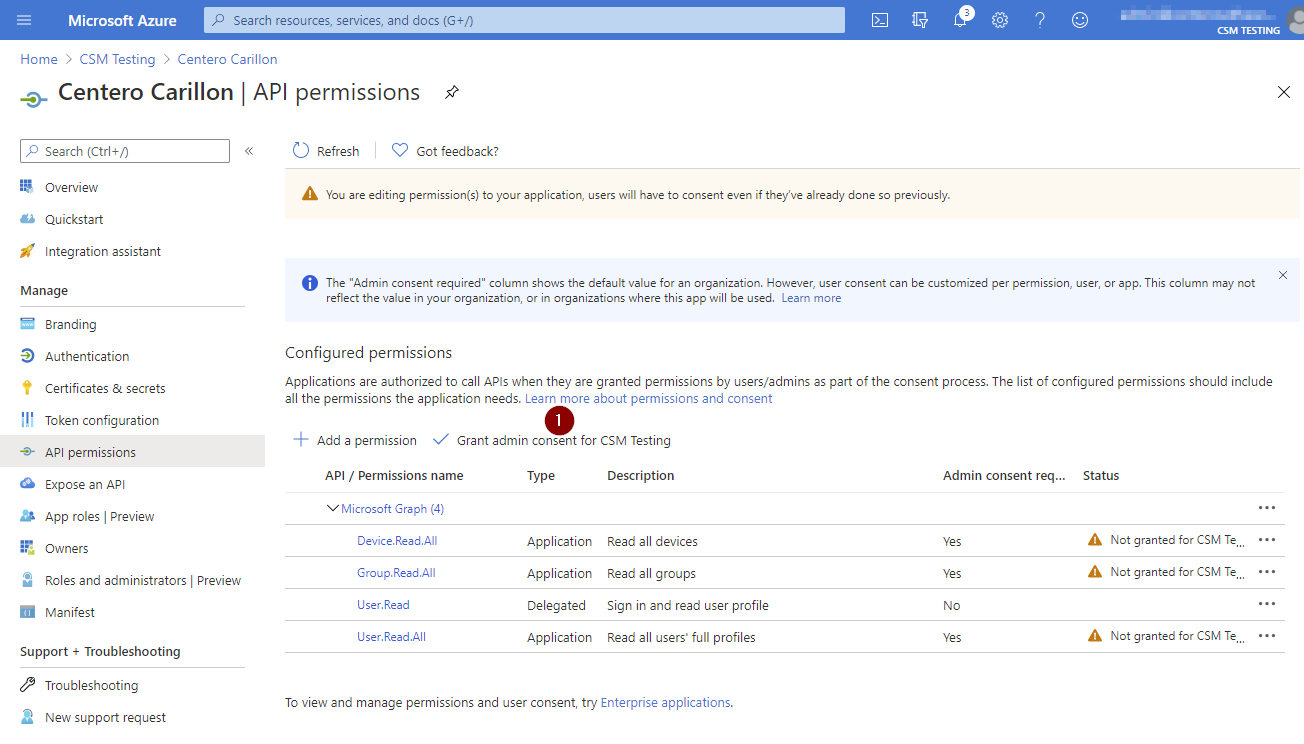
- Verify that you have added three permissions where type is Application and permission values have Device.Read.All, Group.Read.All and User.Read.All and then click Grant admin consent for <your tenant name>
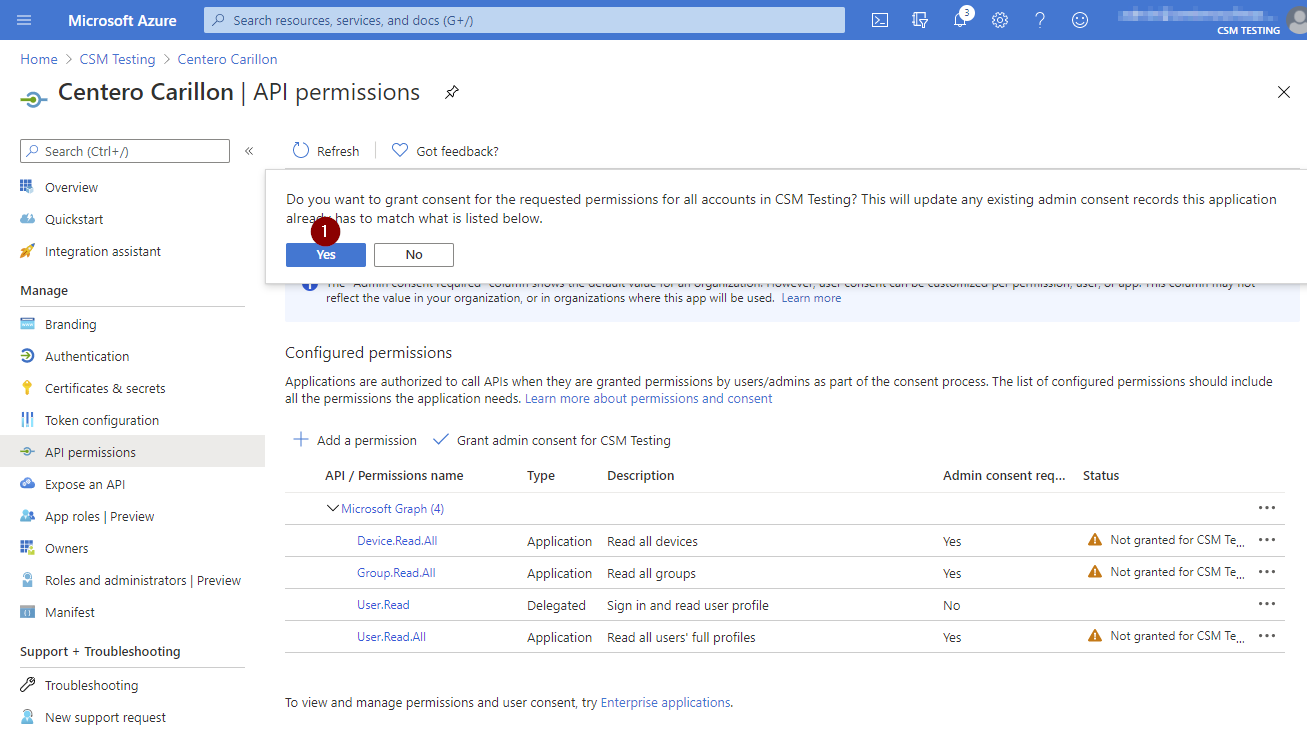
- Click Yes
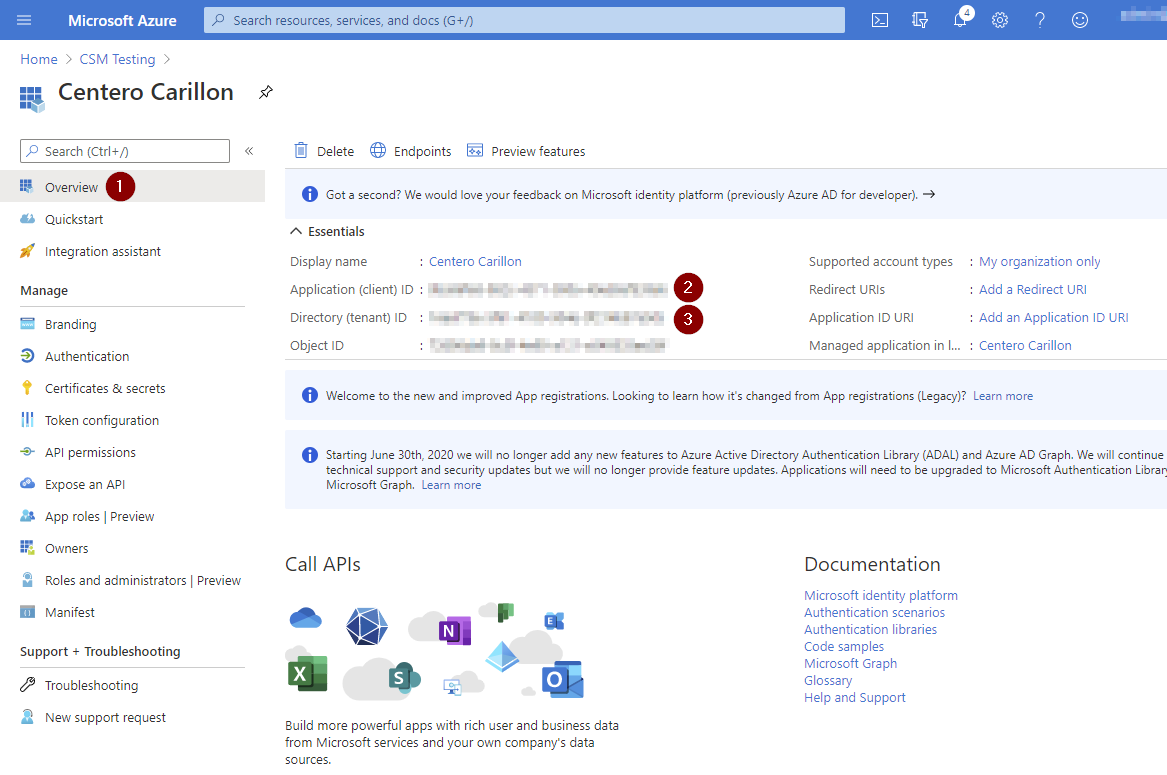
- Click Overview and take note of Application (client) ID and Directory (tenant) ID. Client secret was noted earlier. These values are required when configuring Centero Carillon


2. Carillon configuration
After Azure AD App Registration is done and you have Application (client) ID, Directory (tenant) ID and Client secret available you can continue to add your Azure AD tenant to Carillon
- Open your Carillon management portal and use these instructions to add new Azure AD
- Create management rules that target Azure AD groups or devices
3. Client update
Make sure that your endpoints are using Centero Carillon client version 3.1.5014 or later
